Friday, December 21, 2012

Fancy Favor Gift Bag

Another Big Shot project, again using the Fancy Favor Die.  You may have seen these on your travels, basically you cut a second box in patterned paper, trim off the tabs and adhere it together then just slide it over the top of the bottom box, tying at the top to keep it in place.
 
You don't need to undo the bow every time, you just slide the patterened piece off upwards to reveal the box underneath, so cute.
 
 
Again we used stamps from the "Joyous Celebrations" set, loving the cute Reindeer and here he is hovering under the misletoe waiting for another Reindeer to pass by!!
 
The bronze button co-ordinates with the Espresso in the Reindeer and the patterened paper tied with Bakers Twine around a piece of Lucky Limeade Ruffled Ribbon.  A couple of jingle bells complete the project.
 
The Designer Paper is from the Candlelight Speciality pack which is still available until the end of January and has lots of designs that could be used for non-Christmas projects, including the lovely Flocked Acetate sheets that come with it.

 
Back soon x

Wednesday, December 19, 2012

Big Shot Class

We used the Fancy Favor die on two of our projects this month, firstly on this Hot Chocolate Pouch for the pocket.  The Real Red sleeve holds a sachet of Cadburys Hot Choclate and I found yet another use for the "skinny" cello bags which was attached to the sleve with a velcro dot crammed with mini marshmallows.
 
 
I adore the Snow Flurry die which cuts out these beautiful snowflakes, the glitter cardstock just finishes them off. 

 
We used the Ticket Duo punch to create the "Merry" detail along the bottom, the wording is from the "Pennant Parade" stamp set and the "JOY" is from "Joyous Celebrations" set inked with the Marker Pens to give a multi coloured finish.

 
Here is the sleeve when taken out of its pouch.


Friday, December 14, 2012

Make a Card Make a Difference

It's really difficult taking pictures at this time of the year, the light is so poor.
 
Here are our creations from November's "Make a Card Make a Difference" Class.
 
Of course as you can see the theme was Christmas and we used stamps from the "Ornament Keepsakes" and "Tags till Christmas" sets, both of which have a co-ordinating punch or framelit die.
 
 
For the card we covered the ornament with Dazzling Diamonds and it is just so beautiful and the glitter doesn't come off everywhere, the heat and stick powder makes sure of that!
 
We used a Gumball Green Core'Dinations panel behind our greeting and sanded it with the Sanding Block to get a distressed look as the card had a slight vintage feel.

 
The gorgeous Doily Sizzlit die surrounded the ornament then some leaves punched from the 2 Step Bird Punch.

 
We used the "Fancy Favor" box die with the Big Shot for the next project, it is so quick and easy to put together, I love it!!!
 
I will miss the Tulle ribbon when it disappears at the end of January.


Wednesday, December 5, 2012

Packaging

When I run a class that includes product I like to "gift wrap" it in all different kinds of ways.
 
The brown paper bags are great for this as you can do so many different things with them, some of which you will have seen on here before.
 
They would be great for giving Christmas presents in too, just a few punched out elements and stamped images and your'e there!
 
 
I wanted to find a way of re-packaging the Faceted Buttons and the new "skinny" cello bags that Stampin' Up! have were perfect for them, they looked so expensive, like diamonds strung together lol!! 
 
The pictures are not very good, I took them on my phone and obviously need a little practice!


Tuesday, December 4, 2012

Table Gifts - Petite Purse

At my all day events I love to spoil everyone with goody bags and table gifts, here I made little Christmas Purses containing chocolate money and a Christmas Pudding too!!!
 
They were cut using the "Petite Purse" die and are very quick and easy to assemble, with lots of different versions that can be created.

 
I love everything spotty and this paper is no exception, is from the "Be of Good Cheer" pack and the base colour is Gumball Green which tones lovely with Cherry Cobbler.


Monday, December 3, 2012

Butterfly Gifts

Here are some of the other projects we created at my all day class, not Christmassy at all but designed to be given as a gift.
 
The square card box encased two simple but gorgeous cards, all created using one of the Simply Scrappin Kits called "Afternoon Daydream" which is so beautiful, very feminine, containing Cardstock, Patterned Papers and sheets of cardstock stickers.  These kits are not just for scrapbooking as you can see, everything in there co-ordinates and you get so much product it goes on for ever!
 
 
A card can be put together so quickly using the cardstock stickers


We added some extras, lovely Faceted Buttons and giant Jumbo Pearls along with some co-ordinating ribbon.

 
The butterfly is from a stamp set called "Papillion Potpourri" and has a matching "Elegant Butterfly" punch.

 
Another project was this decorated tin that could contain mini notecards or even chocolates or jewellery.  One of the sheets of stickers in the Kit is full of borders and we used a couple of them on here, again, so quick to assemble, just peel and stick!  We covered the insides with patterned paper too.


Monday, November 26, 2012

All Day Spectacular

In October I held my all day "Christmas Spectacular" and thought that I should finally get around to showing you the projects we created before the big day comes and goes!!!
 
 
We created several projects during the day, most were Christmas orientated but I threw in some non-christmas projects that could be given as a Christmas Gift.
 
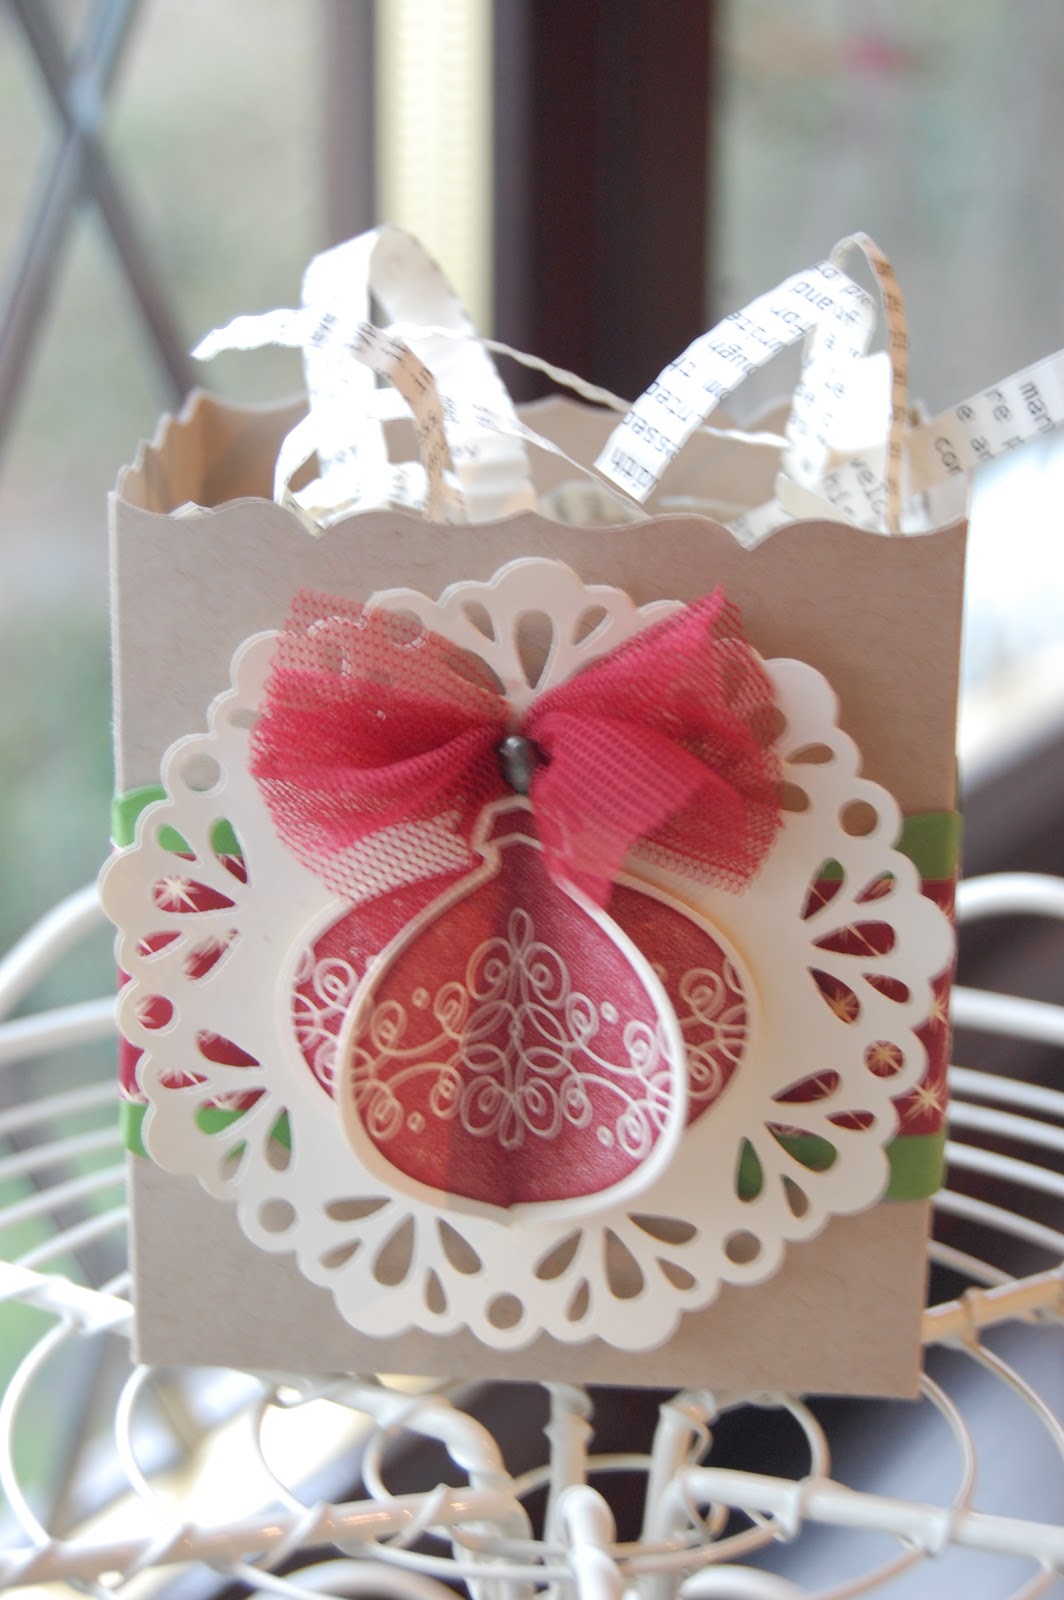
We decorated one of the Kraft Boxes that are available from Stampin' Up!, they are a great way of creating gift packaging in a whizz!  Everyone received a pack of these and we decorated one as shown below, with the gorgeous 3D cardstock bow and a tag which was inspired by one in the Seasonal Catalogue.
 
 
We used the "Snow Flurry" snowflake die to add some dazzle to the tag.

 
We also decorated a glass jar, suitable for filling with Christmas Chocs or even a gift.  For the bow we used the Cherry Cobbler Tulle, which is lovely for your christmas packaging as it ties beautiful bows.
 
We used the Candy Cane stamps from "Scentsational Season" set and cut them out using the co-ordinating Framelits dies, a pretty quick and simple project to put together and very cost effective too.

 
Mine has got a little battered as I have been taking it with me on my travels to share with everyone!  Love the new Doily Sizzlits die, so pretty.

 
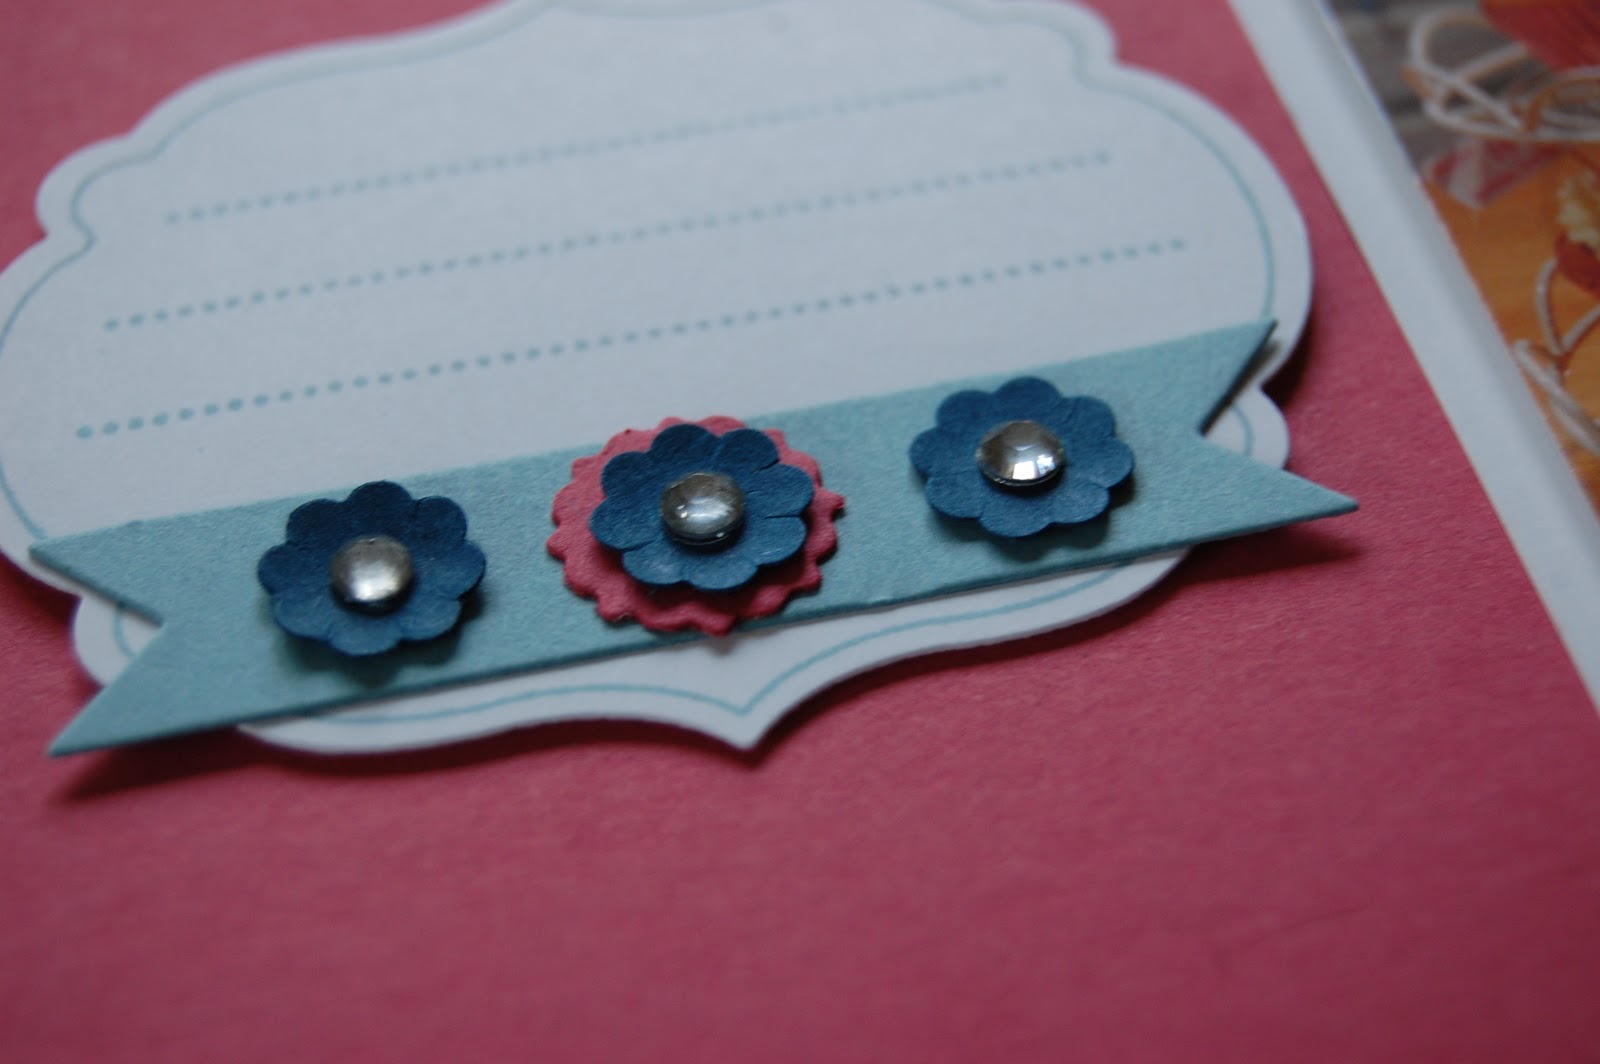
Next we made a Gift Card holder that encased a wrapped choccy bar, not my idea I have to say, I saw one and loved it so I re-created with my own designs.
 
Inside the front card is a slot to hold a Gift Card, have tried to upload a picture of the inside but blogger is misbehaving and keeps rotating it!
 
 
Inside we wrapped a small chocolate bar with DSP and decorated with a tag from the "Tags til Christmas" stamp set.  Love how this set has co-ordinating punches to cut them out with ease!
 
The "tray" just slides out to reveal the chocolate surprise inside, quite neat!

 
Everyone received their own "Traditional Touches" stamp to create their projects and we used the Marker Pens to give a multi coloured finish to our stamped images.

 
At my all day classes, lunch is included and I made a Lasagne and Pasta Bake which went down very well with hot baked rolls, although everyone is so busy being creative, there's never much time to be spent eating!
 
Check back later to see the other projects we created....


Tuesday, November 20, 2012

Icing on the Cake

When Sophie was 16 at the beginning of October, we all went out for a family meal and the plan was for everyone to come back to ours for coffee but the night went on a little longer than expected so we ended up going home with just us.  Sophie's cousin had made her some gorgeous cupcakes and was going to unveil them when we got home.  We of course, still lit the cakes and sang to Sophie, yet again, to her embarrassment and devoured the cupcakes which were divine.
 
Loving the "Patio Party" designer papers, they contain the new "In Colours" Midnight Muse, Primrose Petals, Summer Starfruit and Raspberry Ripple, gorgeous!  The alphabet dies have now sadly retired but I have bought myself the new Typeset dies so watch this space!
 
 
Don't you adore the Doilies, they were cut with the Big Shot using the Doily Sizzlit die, so pretty.
 
The "Congratulations" and Chevron are both from "Border Banter" stamps which you can find in the Autumn/Winter Seasonal Catalogue, available until the end of January.
 
I have yet to put the words "on the" to my layout and journal but that time will come one snowy Christmas evening when there's nothing else to be done, I won't forget this evening, we had a lovely family time.  This journal frame from the Apothecary Art stamps is perfect for scrapbooking but works great on your cards and gift projects too.
 
 
Back soon with some more Christmas projects.....
 

Monday, November 19, 2012

Scrapbooking

I can't believe that my little angel has turned 16, and more to the point my son was 18 recently too!!
 
A very simple layout with not too much detail, straight to the point, no journalling but pretty in itself too.
 
The papers are from "Floral District", love the colour combinations of Rich Razzleberry and Baja Breeze teamed with some daffodil delight which I toned down by using a neutral base.


More from the lovely "Papillion Potpourri" butterfly stamps which I also stamped onto the crumb cake base with the same ink colour.

 
A close up of the tone on tone butterflies and the lovely "Finishing Touches" edgelits ziz zag border.


Sunday, November 18, 2012

Christmas Gift still here until 30th November

There's still time to get your FREE paper piercing pack with bundle purchases during November, here's the details:
 
 
Item
Description
Retail Value
Special Price
132260
Christmas Gift (wood-mount)
Includes Ornament Keepsakes Stamp Set (wood-mount), Candlelight Christmas Specialty Designer Series Paper, Festive Paper-Piercing Pack
£49.70
£42.45
132261

Christmas Gift (clear-mount)
Includes Ornament Keepsakes Stamp Set (clear-mount), Candlelight Christmas Specialty Designer Series Paper, Festive Paper-Piercing Pack
£43.70
£36.45
132262

Christmas Gift (wood-mount bundle)
Includes Ornament Keepsakes Bundle (wood-mount), Candlelight Christmas Specialty Designer Series Paper, and Festive Paper-Piercing Pack
£62.70
£55.45
132263

Christmas Gift (clear-mount bundle)Includes Ornament Keepsakes Bundle (clear-mount), Candlelight Christmas Specialty Designer Series Paper, and Festive Paper-Piercing Pack
£57.70
£50.45


Big Shot Class Projects

As I have been focussing so much on Christmas projects, I decided to keep my November Big Shot Class far from that!
 
We focussed on using the Apothecary Accents Framelits, Lattice Die and Sizzlits Floral Fusions.  My inspiration came from the Annual Catalogue where there is a little square card using the Lattice die which I loved so thought I would re-create it and everything else just followed on.
 
My colour combo is Midnight Muse, Summer Starfruit and Primrose Petals, all from the new In Colour range with a bit of Gumball Green thrown in too.
 
 
I am addicted to using the Naturals Ivory and White card at the moment and I love the heaviness of it, perfect for card bases and it also has a lovely "rough" texture too, unlike the smooth Whisper White and Very Vanilla that we love to stamp on.

 
I adore the butterfly stamps in "Papillion Potpourri" and with the "Elegant Butterfly" punch it makes it so quick and easy to work with.

 
I saw a box on display at Convention using the Apothecary Accents Framelits and knew that I wanted to make one so I chose my own colours and accents and loved the finished result.

 
Adore the "Floral Fusion" sizzlits die that was used to create this cute little 3D flower.  Behind I punched a Baja Breeze 1 1/4" Scallop Circle to make it stand out.
 
I used "Everything Eleanor" for the Primrose Petals Frame behind the flower which fits in lovely with the largest framelit die used to create the box.

 
Here's how the box opens to reveal the gift.
 
 
For the final card we used the lovely "Lady Brocade" embossing folder, definitely one of my faves at the moment.  This time I adhered my Flower Fusion petals directly on top of each other rather than offsetting them as I did on the box, you get a totally different look.
 
The border was die cut using the "Tasteful Trim" XL die which is perfect for die cutting borders!

 
We also used the popular "Little Leaves" sizzlits die.

 
I have limited spaces at this class so if you would like to come along next month and see how you can get more use out of your big shot machine, why not book a space by dropping me an email to stampinkerry@aol.com.
 
If you would like to order any of the products used on these projects and have them delivered on your doorstep or fancy receiving something in your Christmas Stocking, just give my details to your partner/family member and ask them to get in touch with me and I will do the rest!

Saturday, November 10, 2012

Back from the European Convention...

Firstly I must apologise for my absence, since preparing for my trip to the Stampin' Up! European Convention and then on my return my feet haven't hit the floor!

I had the most amazing time in Mainz, Germany and I can't believe that it's come and gone already.
 
We learnt, shared, laughed, cried and of course created at this wonderful annual event.

We flew out from Heathrow last Thursday morning after an early start and arrived at our hotel around 1.00pm so had a few hours to relax at the Hilton before getting ourselves ready for the Silver 2 Reception.


The Silver 2 Reception was an evening especially for demonstrators who have reached a specific milestone in their promotions and we gathered for business talks, swapping and canapes, it was a lovely way to kick off Convention.
 
We received this lovely gift, a Pen Set, as a momento of the occasion and it adorned a beautiful hand crafted tag.


The following morning, we shopped in Momento Mall, swapped till we dropped then did some making and taking before we headed off for a general session.  There were huge boards covered with beautiful creations to inspire us so we clicked away!


On Friday night we had our Awards Ceremony and I was proud to walk across the stage 3 times for Leadership, Sales and for earning the Incentive Trip to Salt Lake City.  I was delighted to have achieved No.1 Sales for the UK, a massive achievement that I never would have believed I could do and I have to say such a HUGE THANK YOU to all my customers that have supported me along my journey with Stampin' Up! so far.  For this I was awarded with a lovely handbag, pictures will follow in a later post, it was beautifully packaged and didn't want to open it!
 
 
The after party was great, buffet food and live music and later we headed back to our rooms to put on our PJ's for our Pajama Party where we made some lovely stamped projects that each of us had brought. 

 
The girls arrived back at the room with a bottle of Champagne to celebrate me achieving No. 1 Sales which was a lovely surprise although I was really scared to pop the cork!!

 
more to follow soon.......